Preferences
This can be accessed by selecting the Preferences button in the toolbar at the top of the main window.

Here you can customise the app to utilise the selections you will use most, and have those selections persist from one run of the app to the next.
There are four principal types:
-
Symbols - create your own symbol set(s) so that you can customise the output to suit yourself
-
Regional - configure the output for your region - e.g. date formats, measurement units, etc.
-
Materials - specify your favourite materials
-
Output - choose the output selections you are likely to use, and eliminate those you aren't
Symbols
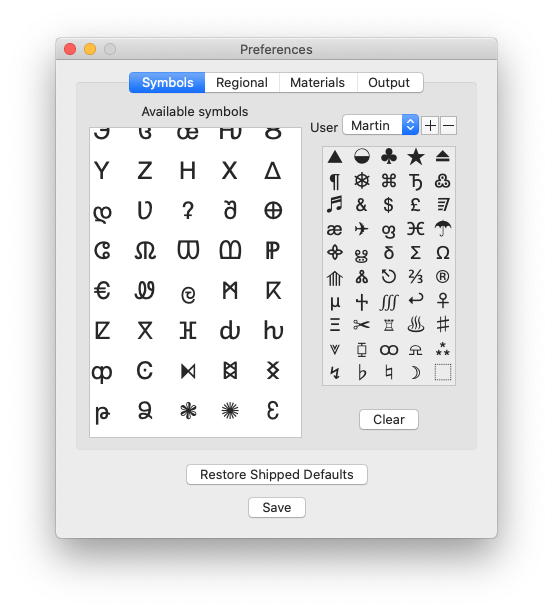
This enables you to create your own custom symbol sets - to be used when generating your output. It may be that you and your friend or partner prefer different symbols on your charts - and this enables you to create a different symbol set for each user, should that be required.
Each symbol set can hold up to 50 symbols. If you then process an image with more than 50 colours, you can still use your symbol set - the app will use those first and foremost, and augment them from others at its disposal.
To the left of the image above is the pool of Available symbols (white background). To the right (grey background) is the symbol set created for the user Martin.
The shipped app will only have the Default symbol set present (which cannot be deleted).
To create a new symbol set, click on the
+
button alongside the User popup, and enter the name of that user, then click Add.
This will present you with a blank symbol set to the right. The symbols in the available symbols pool appear broadly from densest to lightest. There are around 500 to choose from.
To select a symbol for your set, just double-click it in the pool, and it will then be carried across to your set. If you wish to remove a symbol from your set, double-click it in your symbol set, and it will be returned to the pool. Repeat this process until you have all the symbols that you require in your symbol set. These are saved as you go along, so you don't need to click the Save button. If you want to start all over again, you can empty the entire symbol set by clicking on the Clear button.
During this process, you may notice that other symbols also seem to disappear from the pool, as well as the ones you chose. This is because it will endeavour to remove any similar in appearance, so that to the greatest extent possible, it prevents you from selecting one symbol which could easily be confused with another. Of course, this is highly subjective, and symbols that you would not consider easily confused are removed, and ones that you could easily confuse are allowed in the symbol set. But at least it's a start.
Should you wish to delete a symbol set you've created, just ensure that its name appears in the User popup, and click the - button alongside.
Whichever User name is displayed in the User popup when clicking Save will become the default that appears on the Symbols tab from this point on.
Your own predefined symbol set(s) can then be selected on the
Symbols
tab.
Please note that the Restore Shipped Defaults button will NOT remove predefined User Symbol Sets.
Regional
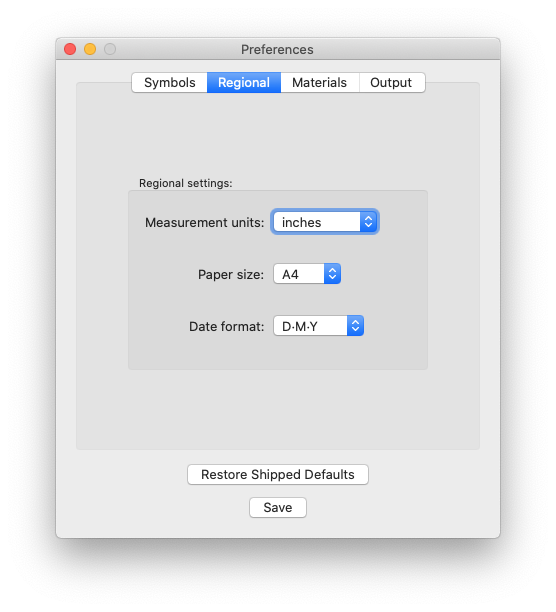
Here you can define the settings for your region or territory - whether you prefer to see measurements in inches or centimetres, paper size as A4 or Letter, and whether dates appear in European day/month/year format (D•M•Y
) or American
month/day/year (M
•D•Y).
Ensure you click Save to register your choices.
Materials
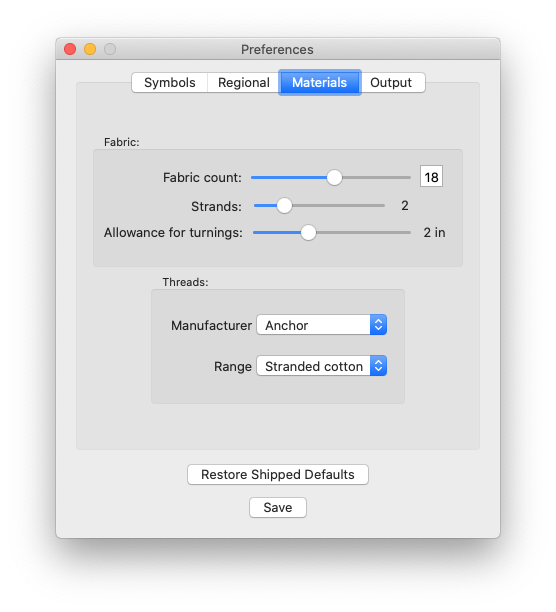
Here you can define the settings for the materials that you routinely use. These include fabric count (for cross-stitch) - i.e. the number of stitches per inch for canvas (e.g. Aida). You can specify how many strands of a six-strand thread you intend to use at a time. You can also enter your 'turnings allowance' (preferred margin around your work) - a minimum allowance of 2" (50mm) is recommended - to enable you to locate your hoop around your work area, and also for framing, upon completion of the work.
Here you can also specify your favourite range of threads - both the supplier, and the type of threads (i.e. either stranded cotton ('floss'), or tapestry wools).
Ensure you click Save to register your choices.
Output
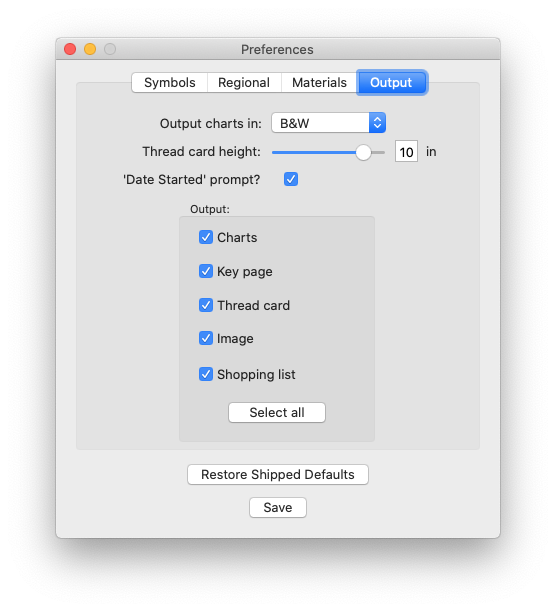
Here you can establish your choices for the output PDF you wish to see.
The first determines whether you choose the output to be in black-on-white (B&W) or colour.
The next specifies your choice of height for thread organiser cards. These are a useful tool while you are working, for keeping track of partially-used lengths of thread. The height should be determined by the dimensions of the container you use to keep your threads and other materials while you are working on the project.
The 'Date Started' prompt? option should be selected if you wish to make a note of the date each page of output is started, while working on your project.
Output
This is where you determine which pages of output you wish to be produced each time you generate output.
The Charts are the 'business end' of the app - the chosen image broken down into pages containing a grid of 100 x 70 stitches (or pixels from the image).
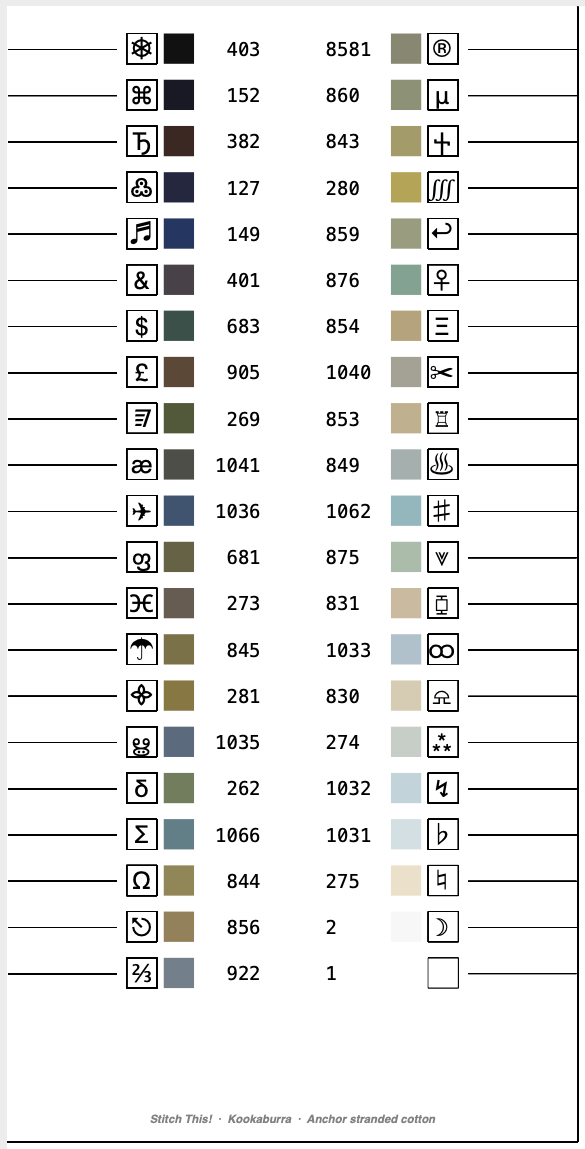
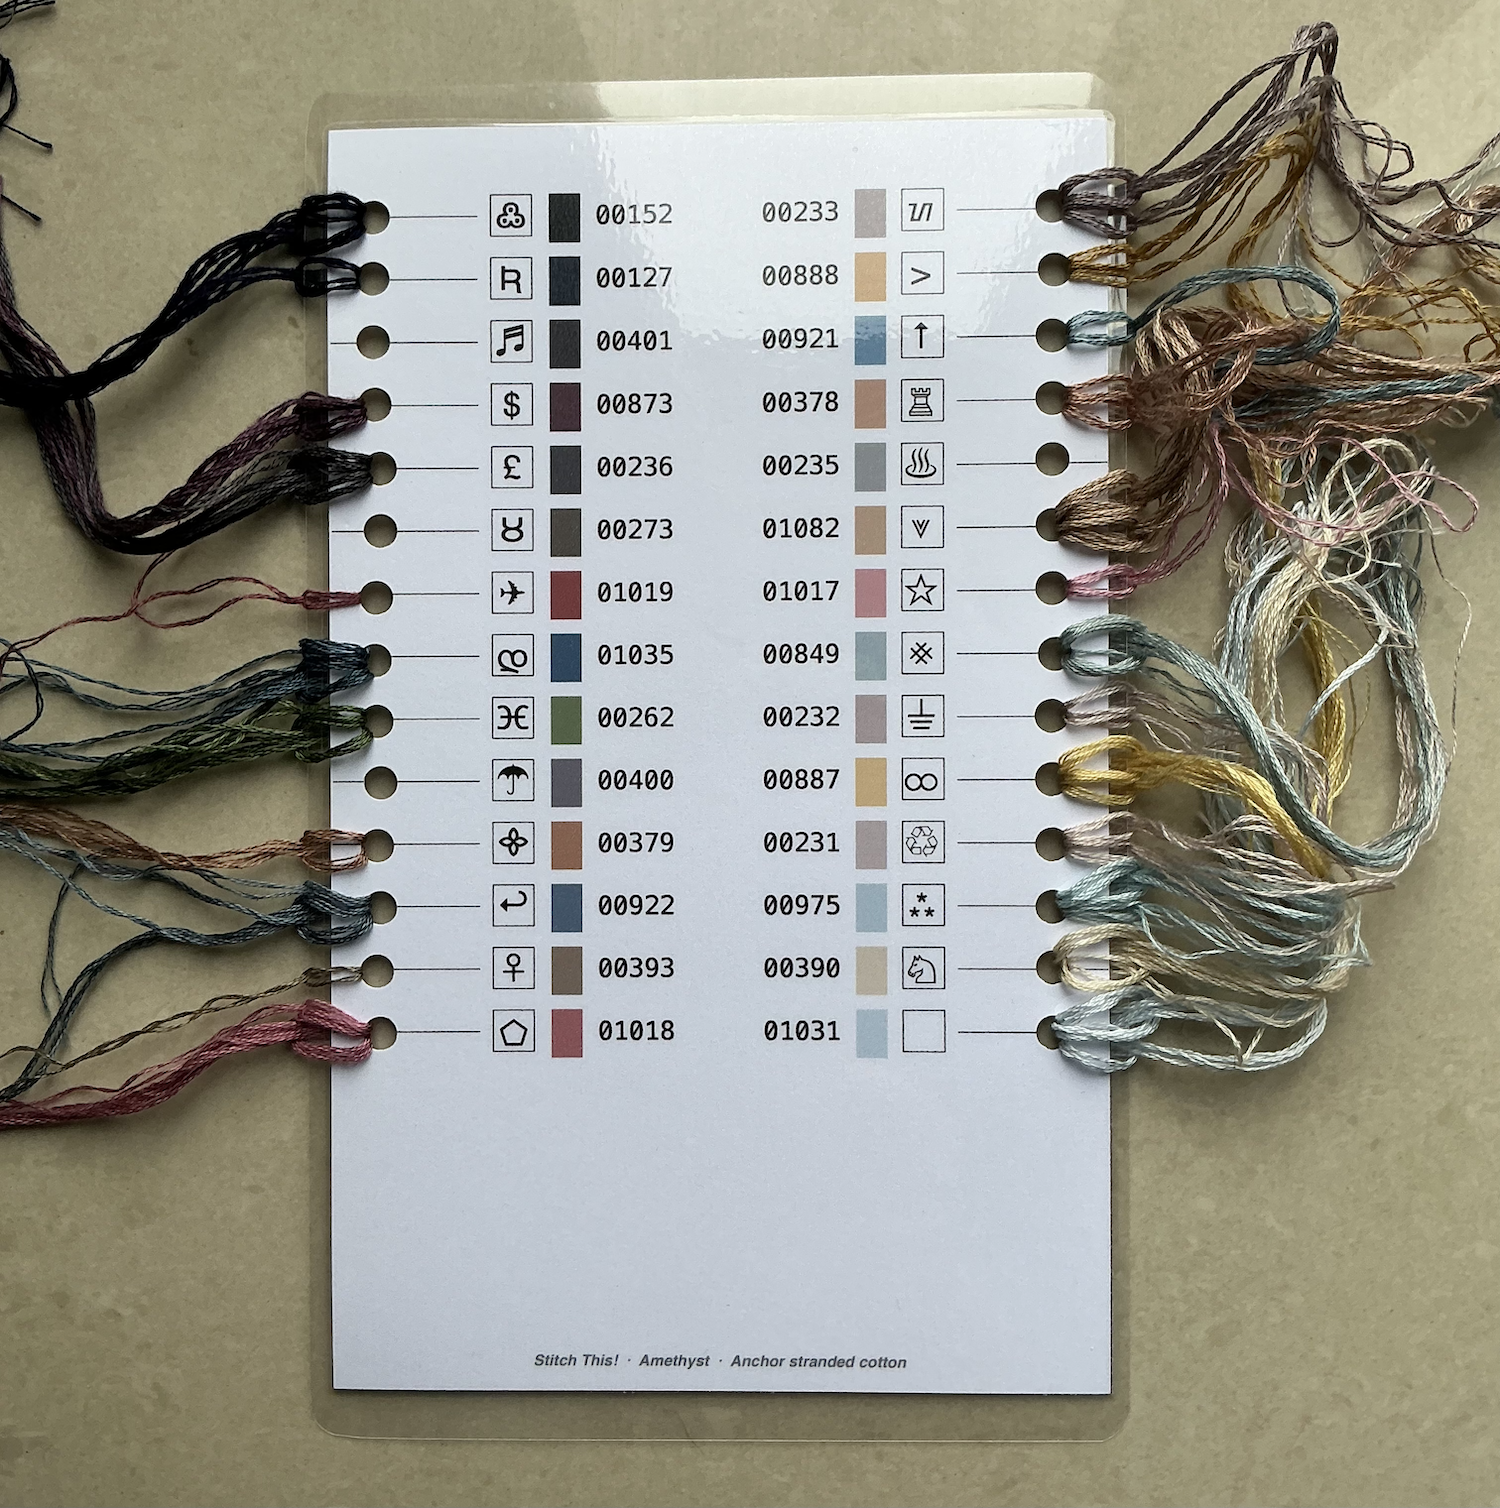
The Key page is an overall summary of the materials you need - how much thread, how many stitches of each colour, approximate estimate of the number of skeins you will need, dimensions of the finished work, etc, alongside the colour number and allocated symbol.
The
Thread card
is an organiser to store your partially-used lengths of thread while you are working on your project. This is spaced and lined to allow use of a standard hole-punch to make the requisite number of holes for all the threads being used. Each is annotated with the symbol and the colour number.
The Image is a full-page reproduction of the image you are working on, for reference. This will show the image in the resolution and number of colours you are working with - so should give a reasonable impression of what the finished article will look like.
The Shopping list is one page that lists the size of canvas you will need, as well as the threads, in number sequence. If you are making use of the
Spares Manager
, this will mark each colour that you already have left over from previous projects with an X.
Ensure you click Save to register your choices.